When I had discovered cigar box guitars, I really wanted to have a go at making one and it seemed to me that starting simple was the best idea. A fretless 1-stringed guitar seemed the place to start and I set about researching.
Diddley Bow
- Originally made with a plank and wire found from around the farm with something to make a bridge like a beer bottle
- Now often made as a one stringed cigar box guitar.
- Good introduction to cigar box guitar building
- Few tools required to build
- Inexpensive materials.
- Easy to play a simple melody.
Canjo
- Use a can for the body and a wooden neck.
- Large can = louder instrument
- Risk of an explosion when cutting an oil can – rinse well with water first
- Screw neck and can together with neck in the open end of a round tin.
- Alternatively cut a square tin to allow for a through neck.
Unitar
One stringed guitars can also be called unitars– from uni (meaning one) and Guitar.
How Easy Is It To Make A Diddley Bow?
I started building cigar box guitars by making a one stringed cigar box guitar and I managed just fine even though I had done very little woodworking before. First I started gathering what I needed:
Tools For Building A Diddley Bow
I used:
- a handsaw
- a chisel
- an electric drill
Materials For Building A Diddley Bow
- box
- neck
- machine head
- guitar string
Outline Of Method To Build a Diddley Bow
- Gathered the tools and materials required
- Drilled sound holes
- Drilled holes in the box for the neck and screwed in place
- Installed machine head
- Fixed an eyelet for the bottom of the string
- Positioned nut and bridge
- Marked fret lines
- Decorated the box
How I Made My Diddley Bow- A Step By Step Guide
I realized I needed something for the body of the guitar and something for the neck. I don’t live on a farm and didn’t have a cigar box or any suitable wooden box so I bought a small box online.
The Box I Chose For my Diddley Bow
I’m not sure if it was originally a cigar box, but it had been turned into a small jewelry box. It measured 7 3/4 x 5 x 2 1/2 inches (20cm x 13cm x 6cm) It had a picture on the front but it was a bit ornate so I turned the box over and used the bottom of the box as the front.
I drilled 2 holes for sound holes and filed them smooth:
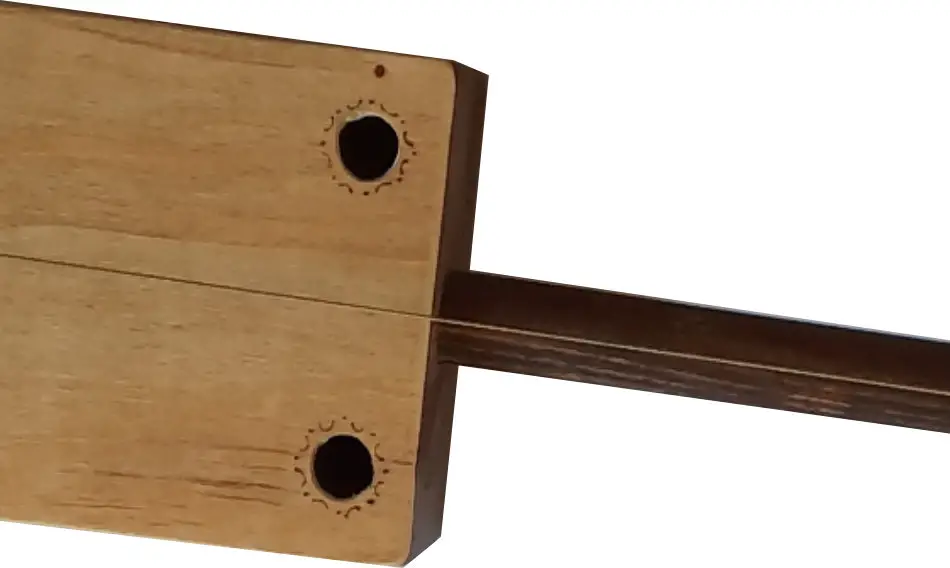
This was not quite as easy as it sounds as the largest drill bit we had was 10mm. For later builds I used the kind of drill bits used for installing ceiling lights. These are called hole saws and would have saved me a lot of effort on this build.
Here is a link on amazon.co.uk and for amazon.com here for a comprehensive set that has a wide range of sizes. If you need something a little less expensive here is a cheaper set on amazon.co.uk and here on amazon.com
How I Made The Neck For My Diddley Bow
For the neck I used an old broom handle that was lying around in the garage.
I cut the broom handle to approximately 35 inches or 88cm. I hoped this was a suitable length and it seemed to work out fine.
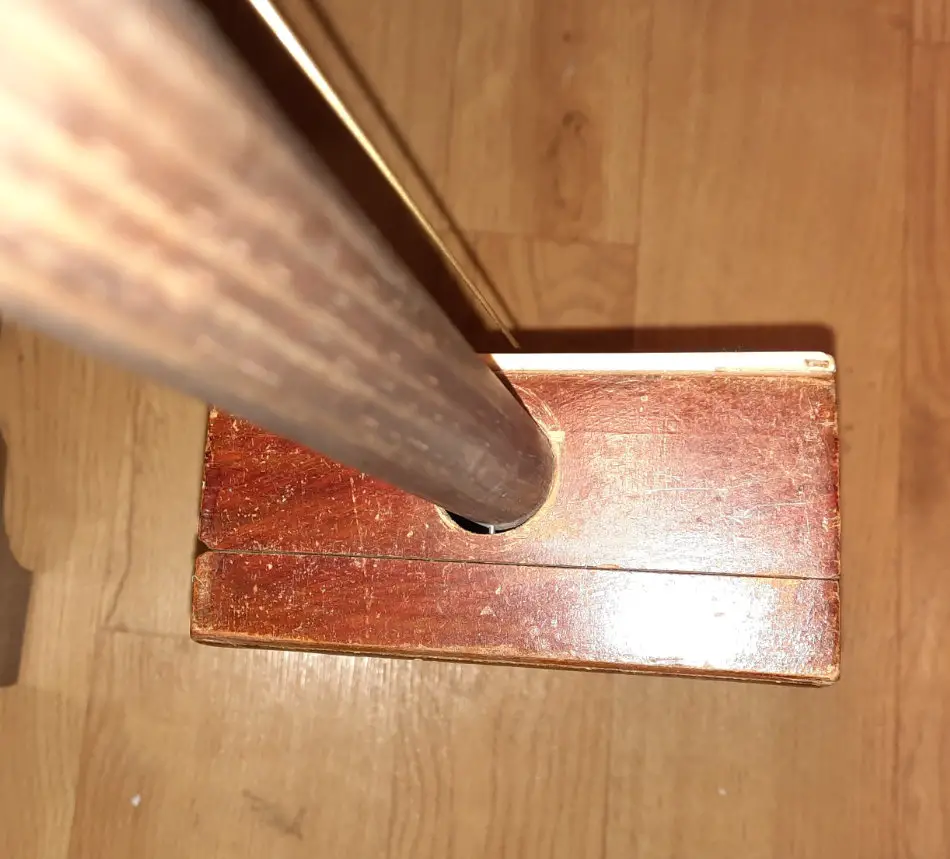
I drilled holes in the two short sides of the box large enough for the broom handle to slide through the box and poke out of the bottom a couple of inches.
Installing The Machine Head
I fixed a machine head ( also called a tuning peg) into the top of the broom handle to secure the string: The broom handle did need a bit of sawing and chiseling to get it thin enough so that the machine head could fit. Then I had to drill a hole in the broom handle neck to fit the machine head through.
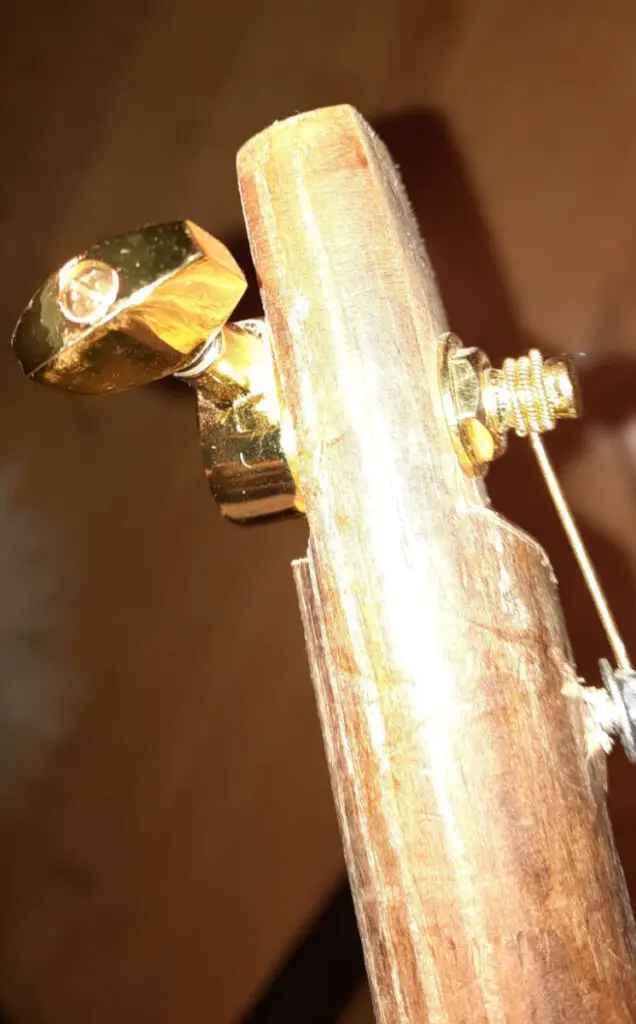
The machine head has a nut to lock it in place so this had to be removed so that I could push the post of the machine head through the wood. Then I tightened the nut and made sure that the turning part was on the left hand side of the handle which had now become the neck.
How I Attached The String To The Bottom Of The Box For My Diddley Bow
I drilled a hole through the part of the neck which came out of the bottom of the box. I inserted a metal eyelet to stop the string from sliding back through this hole and fixed the string to the bottom of the neck by poking it up through the hole and letting the ball end catch on the eyelet:
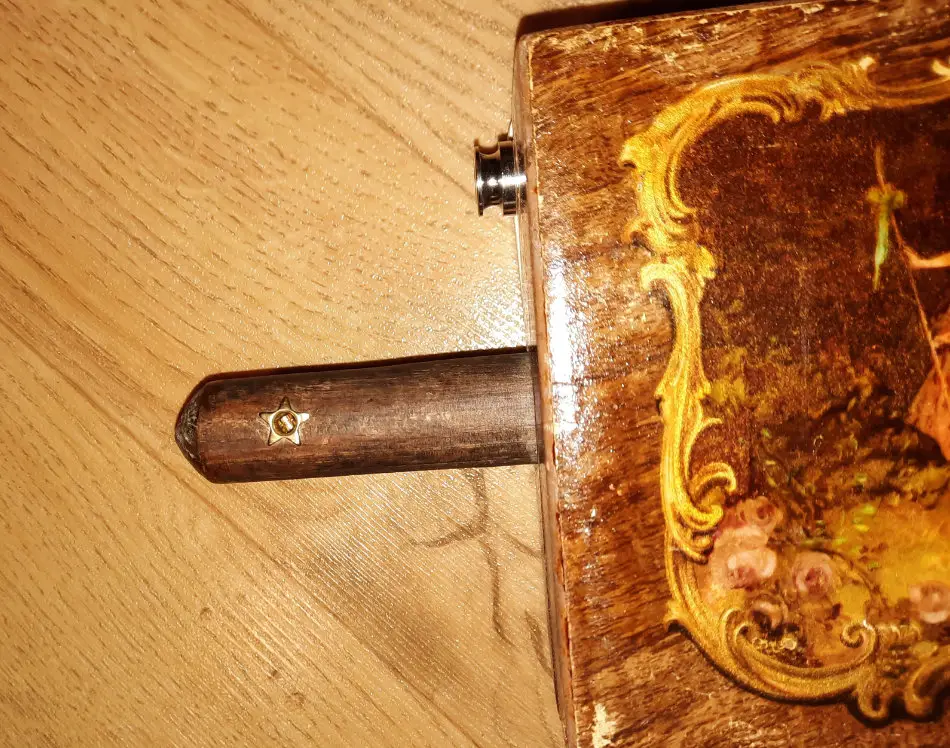
You can see what I mean about the fancy box in this picture. You might also notice the input jack showing that I did install a pickup in this build. It was a lot more straightforward than I thought it might be ( see below)
The Nut And Bridge On My Diddley Bow
I started off using a jubilee clip as a nut but then removed it and added a small screw which kept the string at a good height from the neck. You can see this in the picture above showing how I cut the neck away to install the machine head.
Because the bolt had quite a large head, I found a nut that was the same size to screw on the end of the bolt so that it was level.
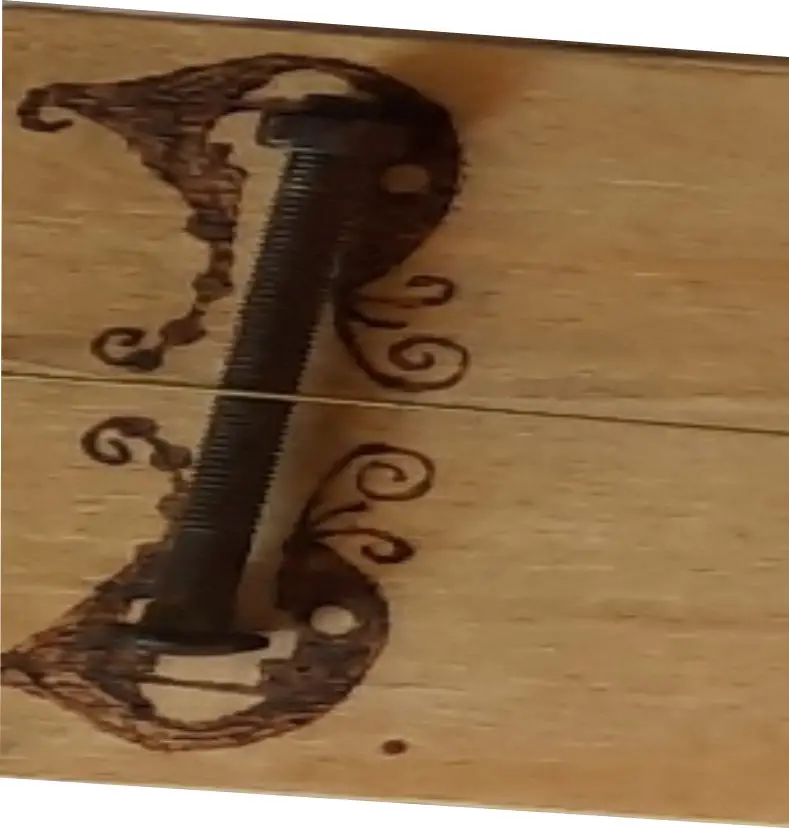
I used pyrography to mark where the bolt went because it’s important not to move the bridge around from it’s initial position. If you accidently move a bridge from a cigar box guitar, the frets that you mark on the neck will not play the notes that you hoped for.
I have a lot more ideas for decorating your cigar box guitar in this article
Marking The Frets On My Diddley Bow
I decided that I would just mark on with a pencil where the frets should be. I didn’t know how to install frets on the rounded neck although I did find out that some builders like to use cable ties as makeshift frets on round necks.
Since I hadn’t installed a nut, I put a screw roughly where I would have put a nut to hold the string roughly in position and then used my ear to mark the fret lines. Because I have played guitar for a long time, I knew how to use the harmonics to mark the notes I required, but I didn’t put every single fret line on.
If you want to mark fret lines and don’t know how to use harmonics, I suggest you use a fret calculator like the one from Stewmac that I recommend in this article. Use a pencil or permanent marker or pyrography to mark the lines.
Installing A Pickup For The First Time
I did install a piezo pickup on this build mainly because I was using this build to learn as many skills as I could for future builds. I didn’t include a volume control ( or potentiometer or pot) mainly because the pickup I bought didn’t have one and I was unsure about soldering one one, even though I have done a bit of soldering when I was building arduino circuits.
The pickup was fairly easy to install. The pickup itself was self adhesive so I just stuck it on the underside of the box lid under the bolt bridge. The jack was already prewired to the piezo but I have since found out that you can buy either prewired or unwired piezo pickups.
I had to drill a hole in the bottom of the box for the input jack, but this was the same size as the holes I’d made as sound holes so it was easy to repeat. I just had to unscrew the nut from the input jack, poke the jack through to the outside of the box and screw the nut back on.
I have a lot more information on pickups in this article and there is a beginner’s guide to amp settings here
Setting Up The String
I left the string fairly loose so that I could easily press the string down with either my finger or a slide. I used a spare E string from a six string guitar set that I had.
I don’t actually tune this string as I just play for fun but I know it sounds lower than the bass string on my six string guitar. When I checked it last with my tuner it was pitched about C so a couple of tones lower than the string was designed for.
How Easy Is A Diddley Bow To Play?
This makes for a very easy instrument to pick out a tune. There is obviously no way to play a chord, but picking out a bass line or a melody is pretty easy. Playing along to the radio or streaming music is fun too, especially as you can play a bass line or the melody.
You can play with or without a pick and with or without a slide. Using a slide makes a louder sound and works really well with an amp. I still find slide a bit tricky but a diddly bow is a great place to start learning slide control.
I have more information about starting out playing with a slide here
Limitations
Since I don’t tune my diddley bow to a particular note, I don’t play with other instrumentalists but for people singing along, especially small children, I found we could have a lot of fun.
The fact that I couldn’t play chords did feel a little limiting at times, but this just spurred me on to other builds with three and four strings.
