When you first start out playing cigar box guitar, you might think it’s all about learning the chords, but learning to strum is equally important.
The great thing about cigar box guitar is that since the chord shapes are a bit easier than on a 6 string guitar, you have more brain space to work on your strumming.
- Move your wrist and elbow joints rather than your whole arm
- Learn to strum with and without a pick
- Use the fleshy part of your thumb or a thumbnail or fingernail
- Start by just strumming down on the main beat of each bar
- Try strumming on different parts of the guitar body
- Practice down and up strokes separately as well as alternating between them
- Try to play the downstrokes and upstrokes with the same pressure
- Then learn to play some strokes a little harder to give an accent
- Learn to keep a steady beat
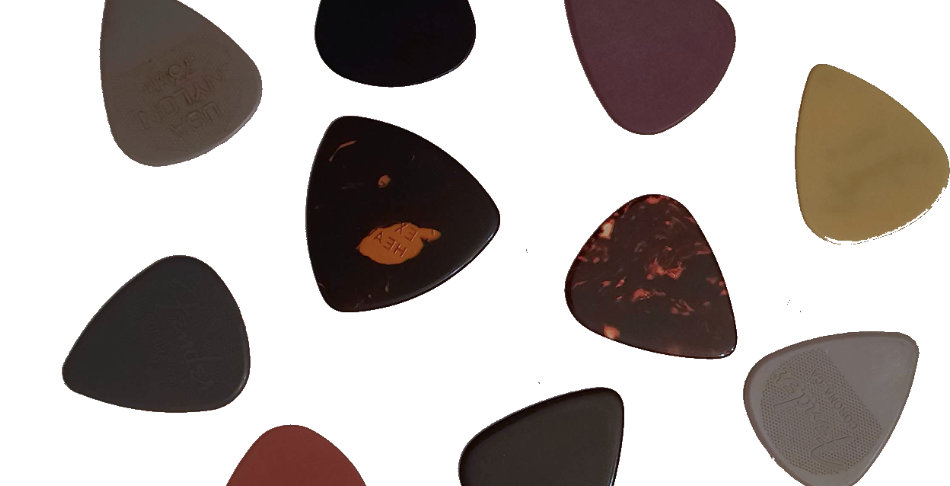
- Try using a pick with a different thickness
We are going to put these tips together to learn a simple strumming pattern designed for beginners.
Arm And Wrist Movements When Strumming Your Guitar
Try to get most of the movement you require at your wrist joint. Your lower arm will move too, but try not to move your upper arm too much. This means you need to try and hold your elbow steady and pivot just your elbow and wrist.
Should I Strum With Or Without A Pick ?
It’s really up to you which you end up using most of the time, but I recommend you get at least passably good with or without a pick ( also called a plectrum).
Strumming for a long time without a pick can make your finger or thumb sore and will wear down your nails too, so get used to using it at least some of the time. Conversely, only being able to strum with a pick can be a bit limiting unless you have several spares, since picks are one of those things that tend to get lost easily.
You may also want to learn to fingerpick later which is a style of playing where you play individual strings.

How To Hold A Guitar Pick
You need to get comfortable holding a guitar pick so there is no really right or wrong way for everyone. Try these tips to help you get started:
- Hold the wider part of the pick between your thumb and forefinger
- Don’t grip too tightly but hold it firmly
- Try holding the pick pointing down at a slight angle or in line with your thumbnail
- Adjust this until it feels comfortable
- Leave about a quarter of an inch sticking out to strum the strings
- Adjust this amount as you strum until you feel comfortable
Different Methods For Strumming Your Guitar
- With a pick.
- With the fleshy part of your thumb
- Using the thumbnail instead of the fleshy part of your thumb.
- Then try the nail on your first finger. This requires a kind of flick of the wrist.
Notice the difference in sound you get. The fleshy part of your thumb is soft and so you get a quieter warmer sound. A thumbnail or fingernail is harder and so you get a louder brighter sound. The same with a pick.
See the note at the bottom of the page on using different picks and this post for advice on choosing a pick
Where Should I Strum On The Cigar Box Guitar?
- Many players choose to play an inch or so away from the end of the fret board.
- You will get more acoustic volume if you play near a sound hole.
- Cigar Box Guitars do not usually have a single large sound hole.
- You will get a tinnier sound if you play near the bridge.
- Experiment to get the sound you want for a particular song.
Down And Up Strums: How To Get Good At Both
Down Stroke
Strum across the strings from the lowest sounding, thickest string over the middle string to the thinnest string. This is called the down strum and is shown on guitar music or tab by using the first symbol below:

You will notice that the down stroke means that you strum downwards towards the floor, but the notes you play are actually getting higher in pitch.
Practice slow and steady to start with. Use your lower arm and wrist to get the movement for the strum and keep your wrist loose.
Up Stroke
An up strum or up stroke is basically the reverse of a down strum. Play the thinnest string first and travel to the lowest string. This means you are travelling up towards the ceiling. See the diagram above for the symbol used.
Practice up strokes slow and steady to start with as most people find these a bit trickier than down strokes to start with.
Alternating Strokes
Now that you can play down and up strums in time with an external beat, we need to try putting them together. It’s time to alternate them. Go slowly to start with and try not to strum too hard.
You can practice strumming without a guitar, as if you are playing air guitar: Hold your elbow steady and flick your hand up and down as if you are shaking water off your fingers.
To practice alternate strums on the guitar, play a down strum followed by an up strum and keep alternating. Again play along with an external beat as soon as you can because it’s incredibly hard to play in time when you are the one deciding the time.
Keep the down and up strums the same volume to start with. When you are confident try accenting the first beat of each bar, the 1 of the 1 2 3 4.
Accenting Down And Upstrokes On The Guitar
Initially try to keep the volume of the upstrokes and down strokes the same so that neither sounds louder. This will help you to learn control and not strum too hard.
Later on you will want to experiment with accenting different strokes by playing them with a bit more force. I think it’s harder to play an instrument quietly with control ( This comes partly from my time playing drums)
If you find that your accents just start making everything too forceful and loud, start quieter. There is a time for playing loud and strong. However by learning to play a bit quieter too you will increase the range of music you can play.
Eventually you will learn to play different rhythms by missing out and/ or repeating different down or up strokes. Adding different accents will add to the rhythm of your playing. However to start with just try one down stoke followed by an up stroke and repeat this at a steady beat.
How To Learn To Keep A Steady Beat As You Strum
You need to be able to learn to strum comfortably at a steady rhythm without stumbling. It’s hard to judge if you are playing at a steady speed when you are playing on your own.
- Use a metronome ( which plays steady clicks) to help you keep a steady beat
- Many guitar tuning apps have a built in metronome
- Play along with some music
- Don’t try to play too fast to start with
- You can slow down music on YouTube to 0.75X, 0.5X or 0.25X
- Mute the strings with your fretting hand if you wish- see this post if you need help with muting.
- This allows you to concentrate just on the strumming
- Start by playing the really strong beats only
- We call this main strong beat, the first beat of the bar. The 1 of the 1 2 3 4 for instance.
Strumming Pattern For Beginner Guitarists
Strumming patterns are just different ways of playing up and down strums, sometimes with added single notes.
We are going to learn this pattern:

This probably looks horribly confusing so I’ve written it out again with D for down stroke and U for up stroke:
| D | D | U | D | D | U |
| 1 | 2 | and | 3 | 4 | and |
Here’s how you go about playing this strumming pattern:
- Without strumming, steadily count in your head or out loud 1 2 3 4 very slowly and repeat
- Now add in the “ands”: 1 2 and 3 4 and. Repeat this slowly and steady
- Now change the numbers and “ands” to “downs” or “ups”
- Say down down up down down up.
- Remember to keep the downs steady and fit the ups in between
- Keep repeating this slowly and steady until you feel ready to start strumming.
- Start by strumming the pattern without chord changes
- As you strum, keep going slowly and steadily.
- Then stop and try a tiny bit faster, keeping the beats steady
- Repeat this and you’ve learned the strumming pattern
- Now try adding in the chord changes
This method of learning to say the rhythm in words before you try to play it really helped when I was teaching beginner drummers. You need the rhythm in your head before you try to play it with your hands.
The pattern above is a very common and easy strumming pattern once you get the hang of it, but obviously like everything else new will take a bit of time to perfect. The trick is to keep your hand moving up and down at a steady pace but miss out playing the up strum between the first two down strums.
You will find that you need to concentrate on moving your wrist and not your whole arm, so try to keep your elbow still, perhaps resting on the body of the guitar.
It’s more important to keep the beat steady than it is to play at speed, so go very slowly at first. Set the metronome to 60 or below. That will give you a beat every second or less since the number on the metronome is the beats per minute.
When you have learned a strumming pattern, try using it with different chords. The top menu of this website has lots of pages being added for chord shapes in different tunings including downloadable sheets. I’ve put a summary here too:
- 3-string G D G
- A E A
- Blank Chord Chart And TAB PDF Downloads
- Blues, Rock and Pop
- Building and maintaining a cigar box guitar
- Chords, scales and tuning
- Christmas Music
- D A D
- E B E
- G D G B
- General Info And Helpful Hints
- Looper pedal
- Slide
- Tabs and Sheet Music
I have written an article for an easy beginner friendly 12 bar blues chord progression with a strumming pattern included: Step By Step Easy Blues Chord Progressions: Number 1
Here is a download of some very easy strumming patterns that I will be using in my YouTube video Strumming for Strugglers Lesson 2
Try Using A Different Pick Or Plectrum
Using a pick or plectrum will give you an even louder brighter sound, particularly if you choose a heavy stiff pick. This is not really the easiest pick for a beginner to use and I recommend that you get a medium flexible pick to start with.
However as you get more confident, try using a stiffer pick. This will give you more volume without you actually strumming harder.
